Harnessing KoboldAI with Nebula Block: Step-by-Step Guide to Building Custom AI Characters
AI roleplay is rapidly becoming a creative playground for writers, gamers, and developers. With KoboldAI, you can design immersive characters, while Nebula Block’s serverless inference powers bring them to life seamlessly with scalable, fast, and hassle-free.
This guide shows you how to set up, customize, and scale your own AI roleplay characters in just a few steps.
Why KoboldAI for Roleplay?
KoboldAI is an open-source platform built specifically for creative writing and roleplay scenarios. Unlike general-purpose AI chat tools, it gives you more control over prompts, character definitions, and narrative styles. Key features include:
- Custom Prompts & Personas: Define your character’s backstory, personality, and dialogue style.
- Roleplay-Oriented Models: Optimized for creative storytelling, not just question answering.
- User-Friendly Interface: Easy to experiment with settings, memory, and conversation flow.
- High-Performance Infrastructure: ensuring smooth performance and quick responses during roleplay sessions, even with multiple characters involved.
When paired with the right infrastructure, KoboldAI becomes a powerful roleplay engine for both casual users and developers.
Why Nebula Block?
Nebula Block, a revolutionizing cloud computing and AI solutions is providing flexible AI infrastructure through powerful APIs:
- Serverless AI Mode: Run inference instantly with zero setup, perfect for quick roleplay sessions.
- Scalability: Easily move from solo roleplay to full-scale multiplayer AI storytelling.
- Cost-Effective: Pay-per-token for premium models, plus 20% discount on all Gemini models.
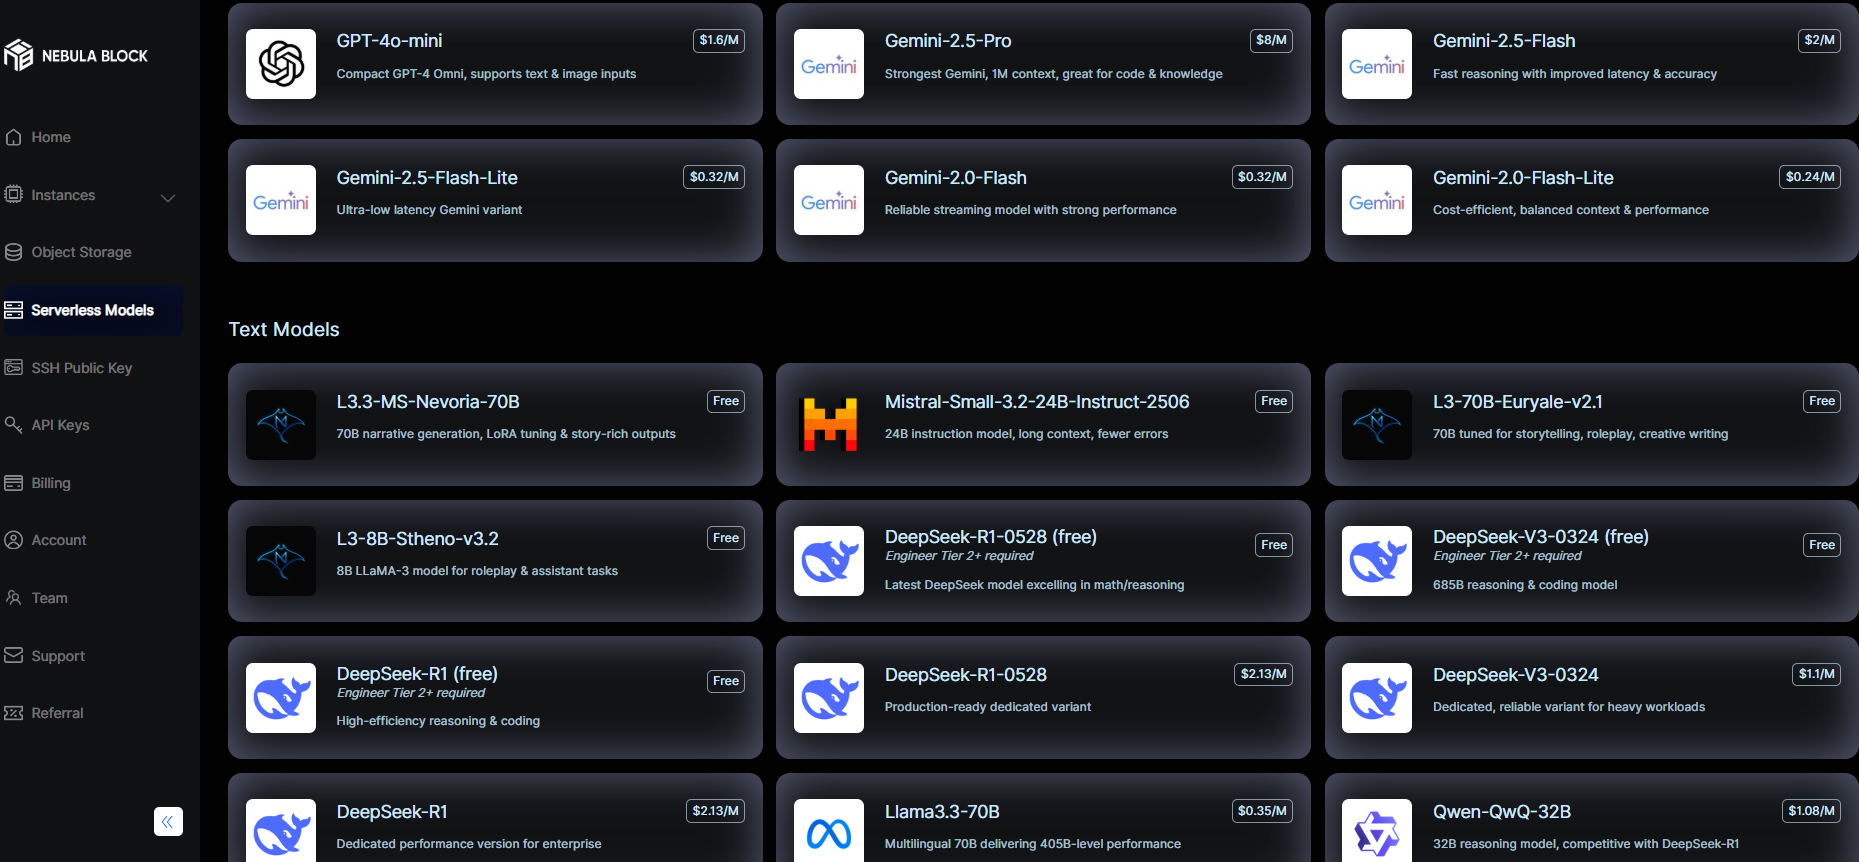
- Free APIs: Access popular models like DeepSeek (R1, V3, R1-0528, V3-0324), Mistral, Nevoria, Euryale, and more at no cost.
For roleplay enthusiasts, this means seamless AI character interaction, freedom to customize, and affordable scaling without the restrictions.
Step-by-Step Guide to Building Custom AI Roleplay Characters
Step 1: Familiar with Nebula Block Account
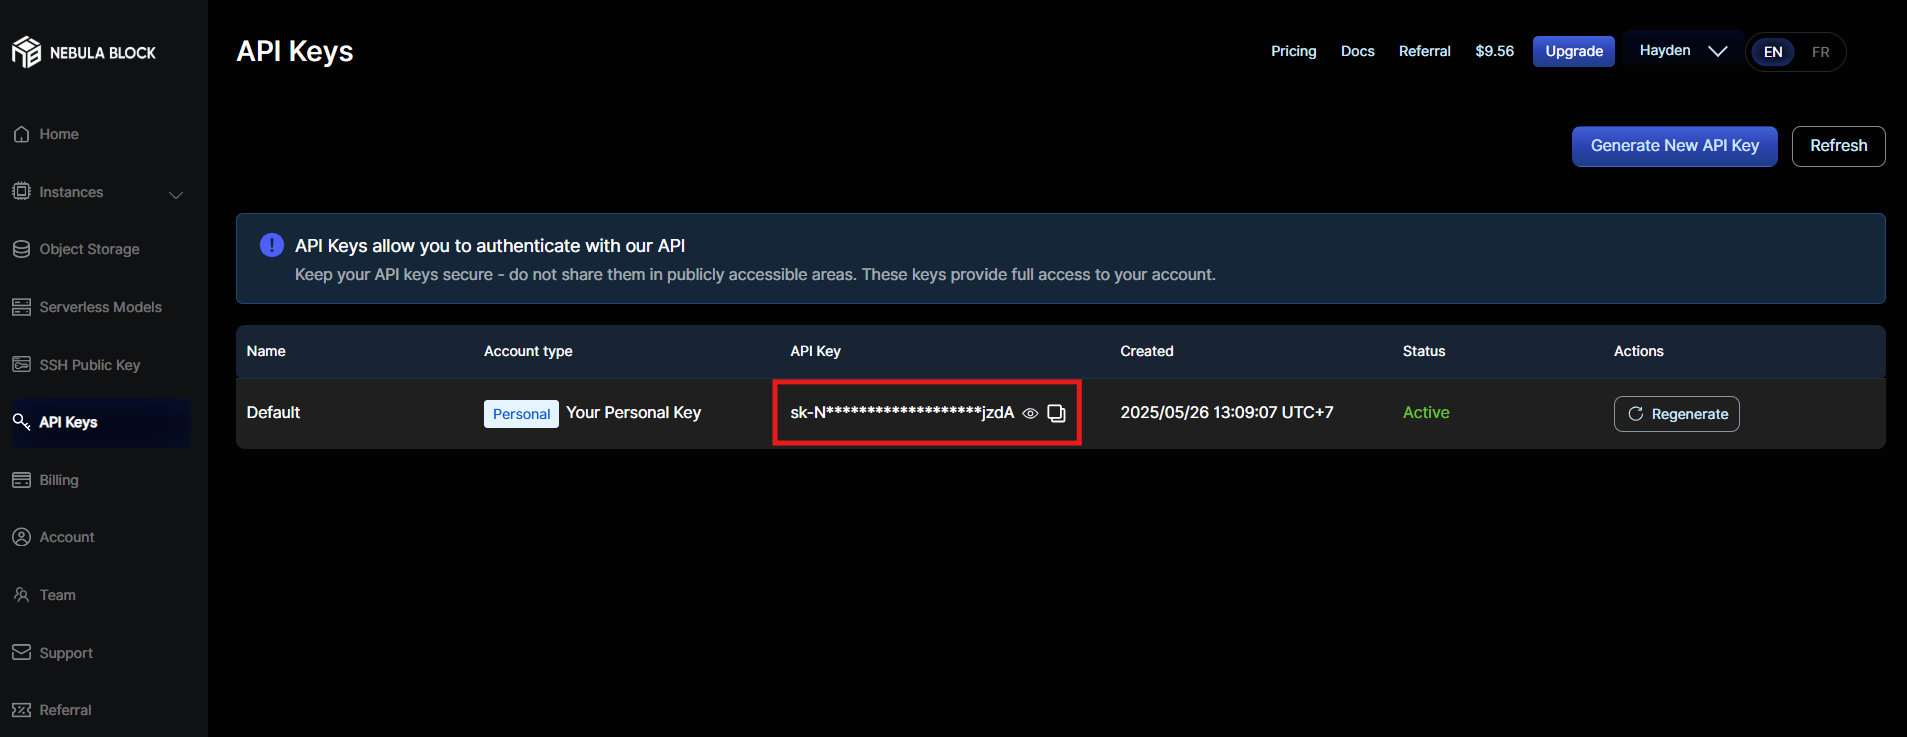
- Create an Account: Visit Nebula Block and sign up for free.
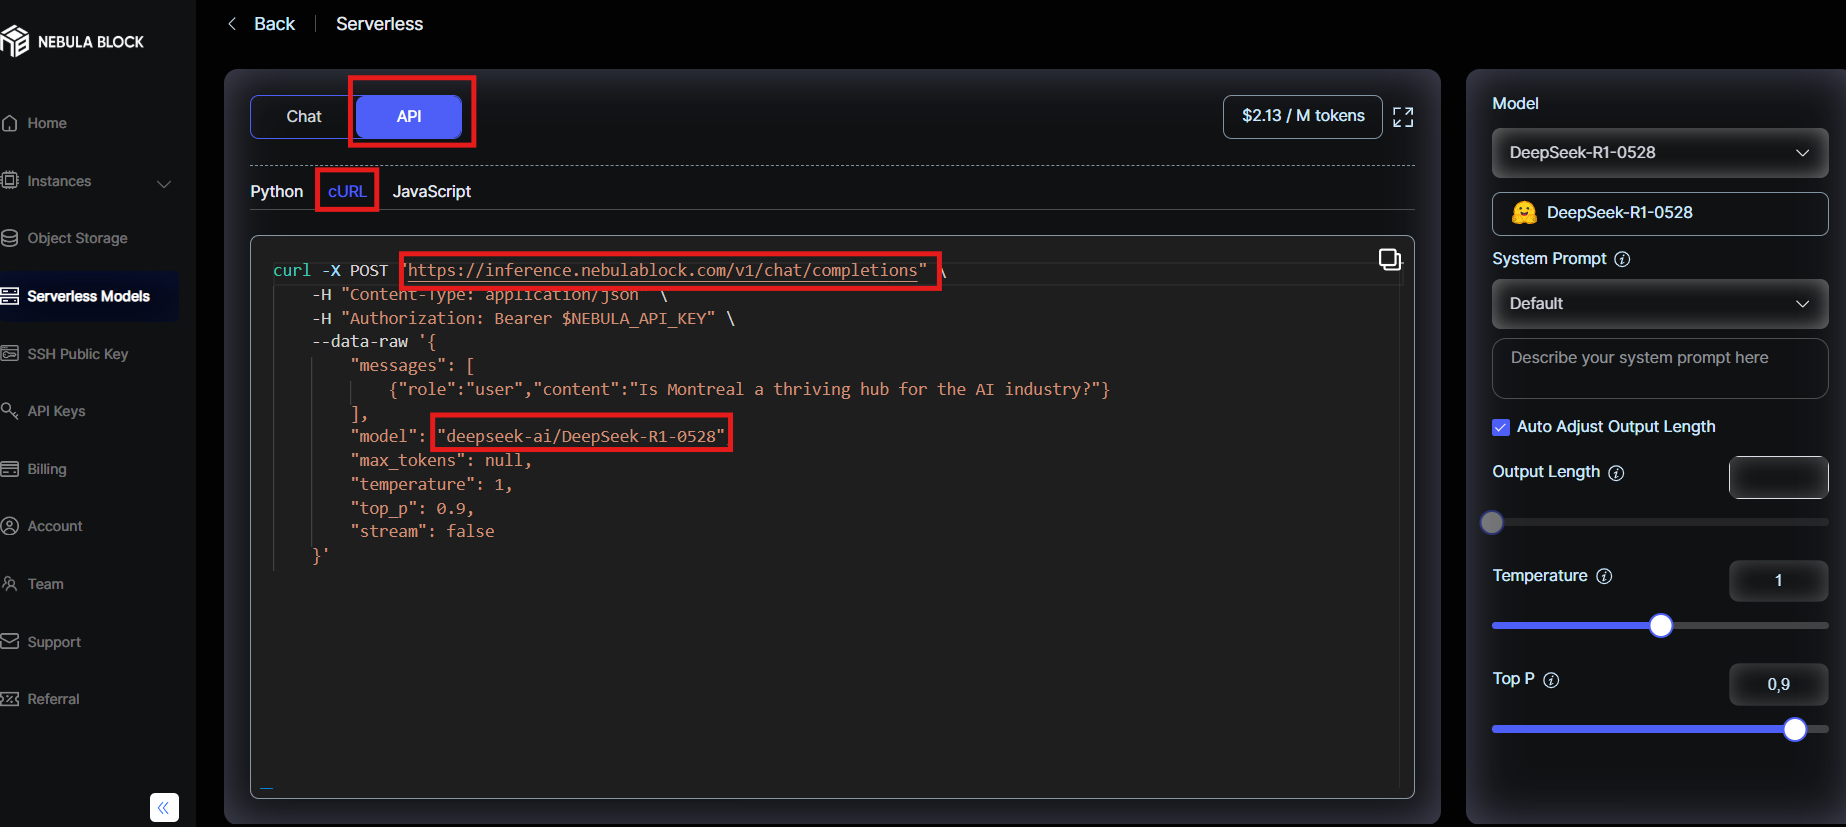
- Find your Model and get the API:
- Copy your API Key
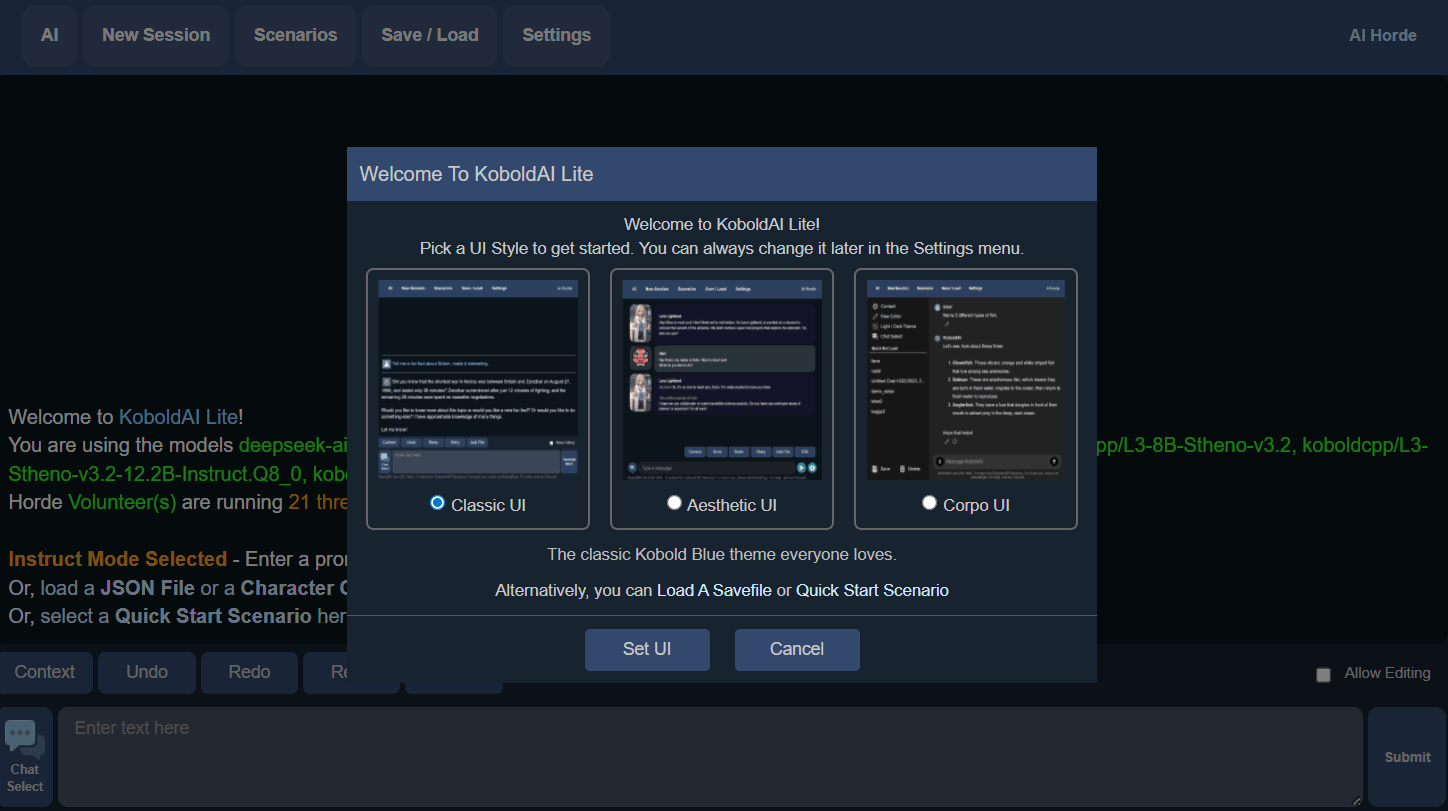
Step 2: Open KoboldAI Lite
Access KoboldAI:
Step 3: Configure KoboldAI
- Select AI Provider: choose OpenAI Compatible API
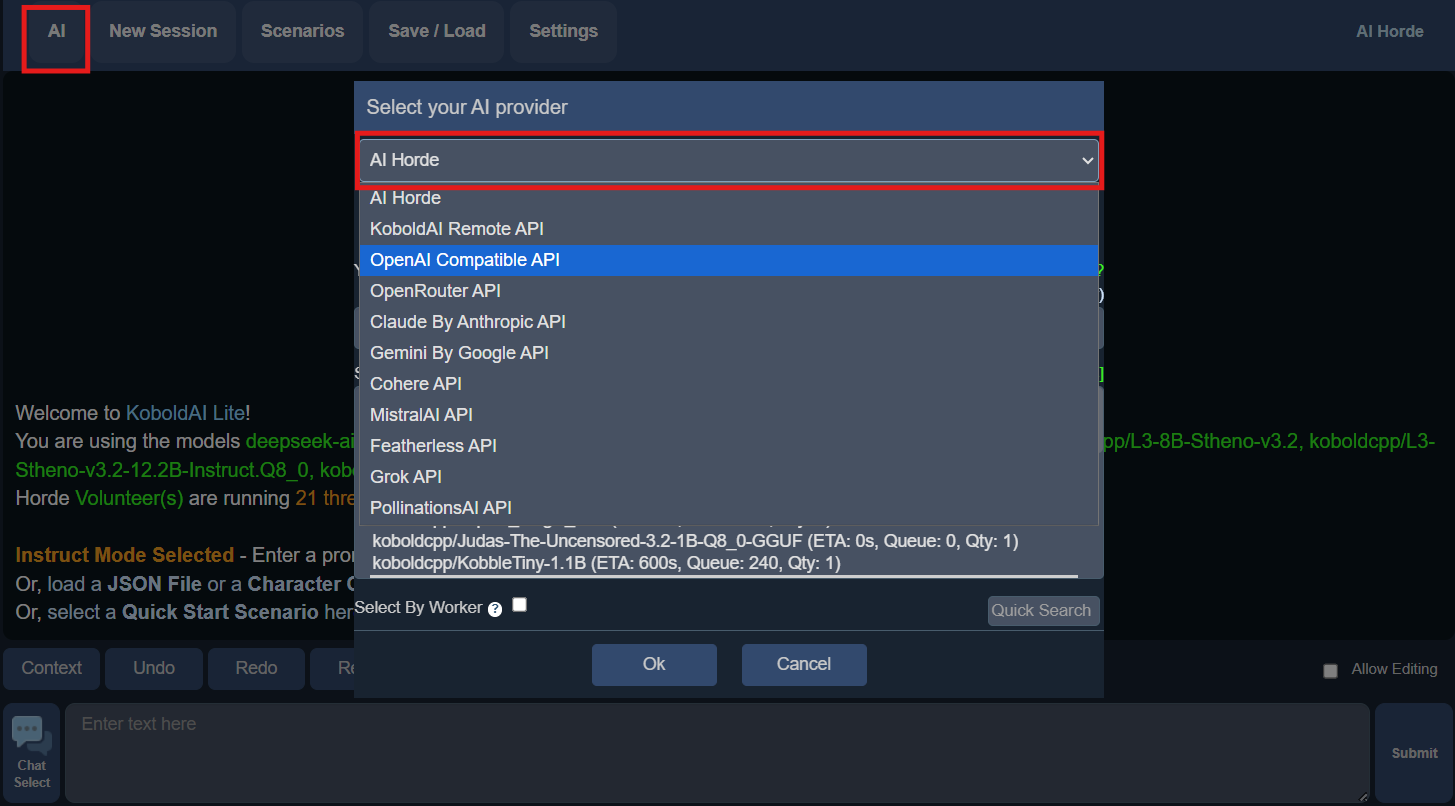
- Enter API Configuration: Fill the input from Step 1
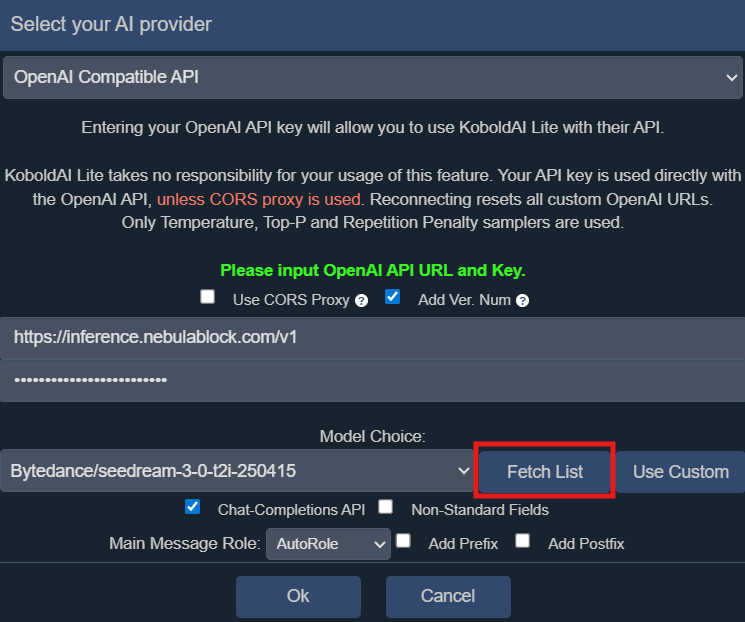
Nebula Block endpoint:
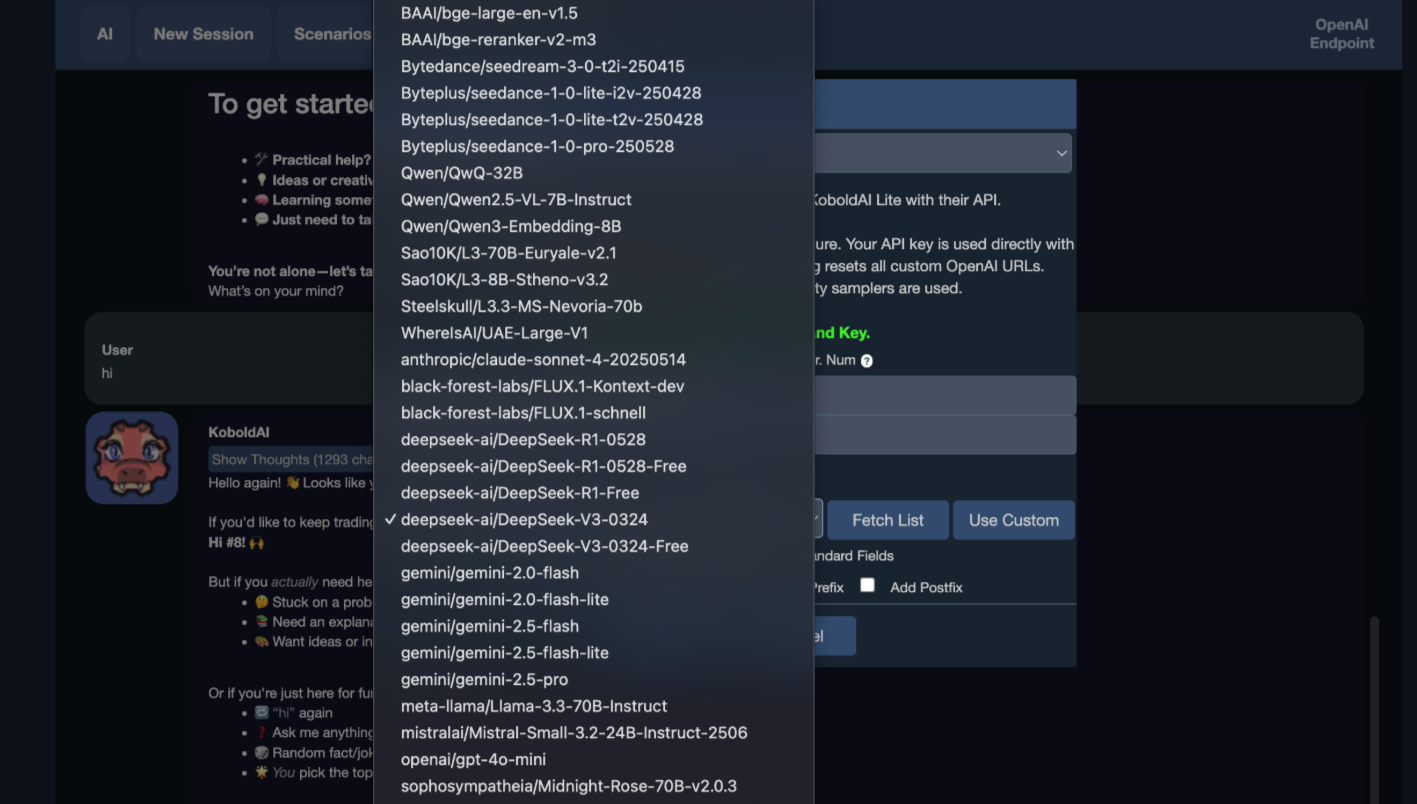
https://inference.nebulablock.com/v1- Choose the model, here we will take DeepSeek-R1-0528 as an example:
Note: To use DeepSeek API Free versions, you need to reach Engineer Tier 2 - which means you have added payment card to Nebula Block, no charge.
- Click Use Custome:

Step 4: Customize Your Character
- Quick Start – Select a Scenario
Here you choose how you want to start your session. You can choose a scenario from the options, Upload file/character card or Enter the prompt to the input box.

👉 This is where you define whether you want a freeform story, roleplay, or instruct-based chat.
- Save / Load / Export File:
This lets you save and manage your sessions:
- Download File / Open File / Share: Export or import your stories, character setups, or scenarios.
- Local Browser Cache: Saves temporarily in your browser. Warning: it can be erased if you clear cache.
- Save Slot: Quick save option in slots, but not permanent unless downloaded.
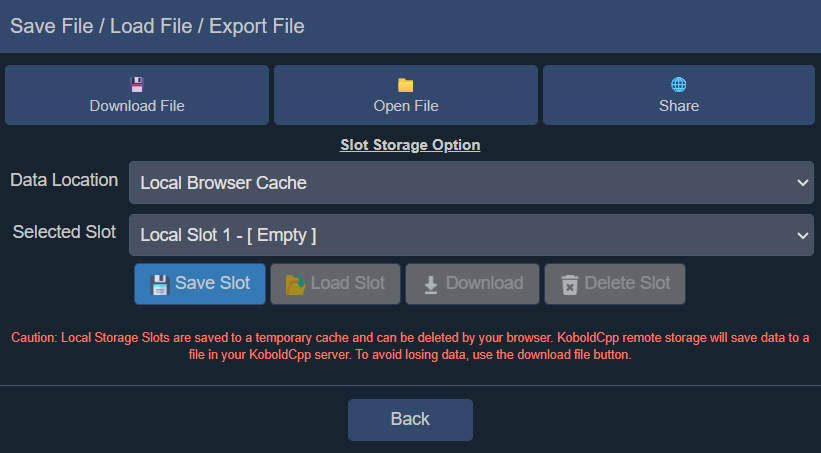
👉 Best practice: Always download important sessions to avoid losing progress.
- Settings
Here you can fine-tune AI behavior and interface for a better roleplay experience:
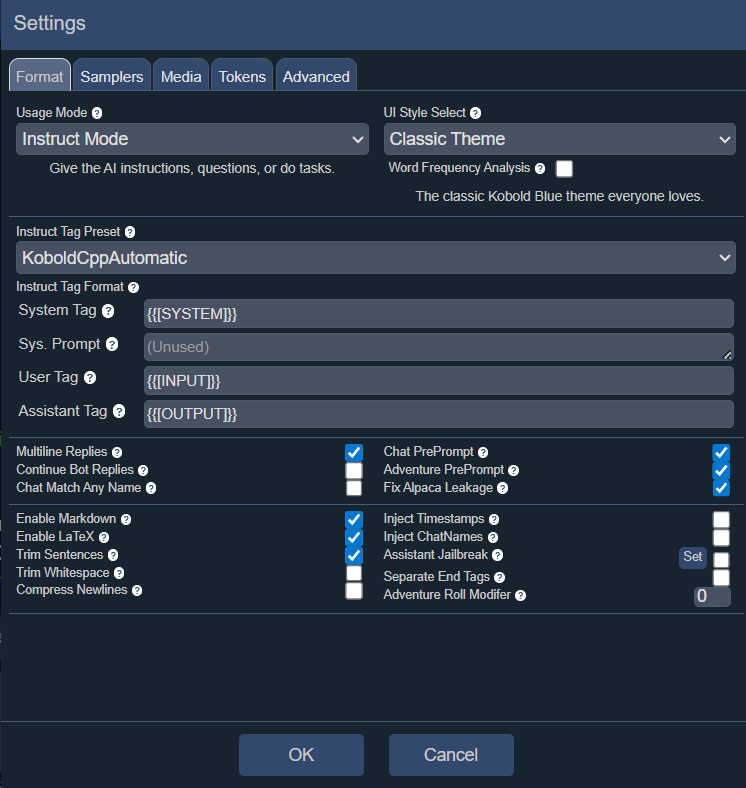
- Usage Mode: Choose Instruct Mode (for structured Q&A) or others like Chat / Story.
- Tag Format: Defines how user/AI/system messages are handled. Default settings work fine for most cases.
- Multiline Replies / Continue Bot Replies: Makes the AI generate longer responses or continue automatically.
- Enable Markdown & LaTeX: Useful if you want rich formatting or math support.
- Adventure/Chat PrePrompts: Adds extra system prompts to guide storytelling or roleplay tone.
🔧 Advanced Tab (extra customization)
- Token Streaming: Choose how text appears (instant or streaming word by word).
- Autosave Session: Saves your progress automatically in case the browser closes.
- Render Options: Control whether Markdown, special tags, or HTML are processed.
- Run in Background: Keeps the AI session alive even if the tab isn’t focused.
- Custom CSS / User Mods: Apply themes or UI mods for personalization.
- Autoscorll & UI Adjustments: Smooth scrolling, side panel mode, inverted colors, or custom background images.
- Experimental Options: Extra toggles (e.g., Raw Instruct Tags, Endpoint Selector). For advanced users, it may cause instability.
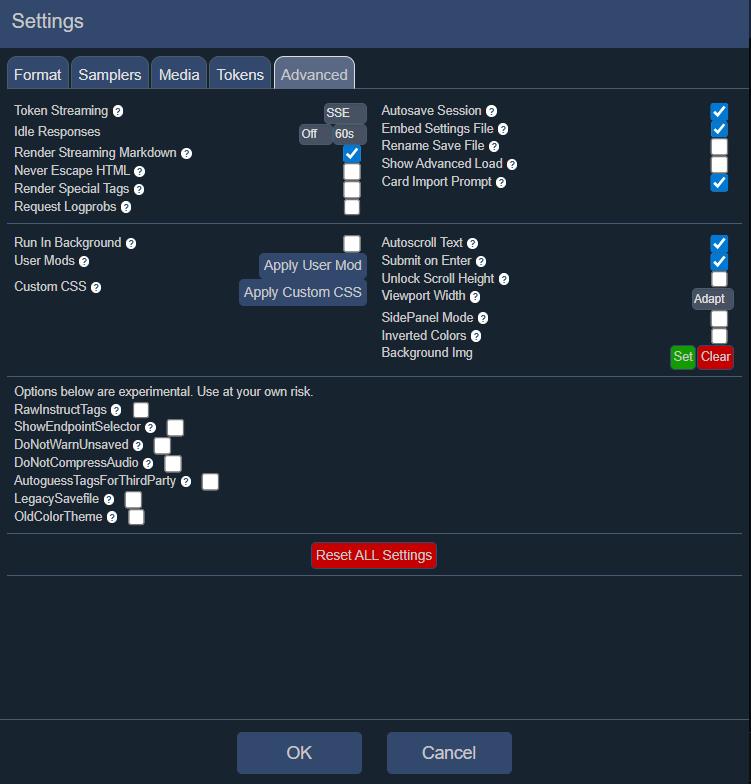
👉 Best practice: Stick with defaults. Only tweak Token Streaming, Autosave, or Autoscroll if you want smoother, more immersive roleplay sessions.
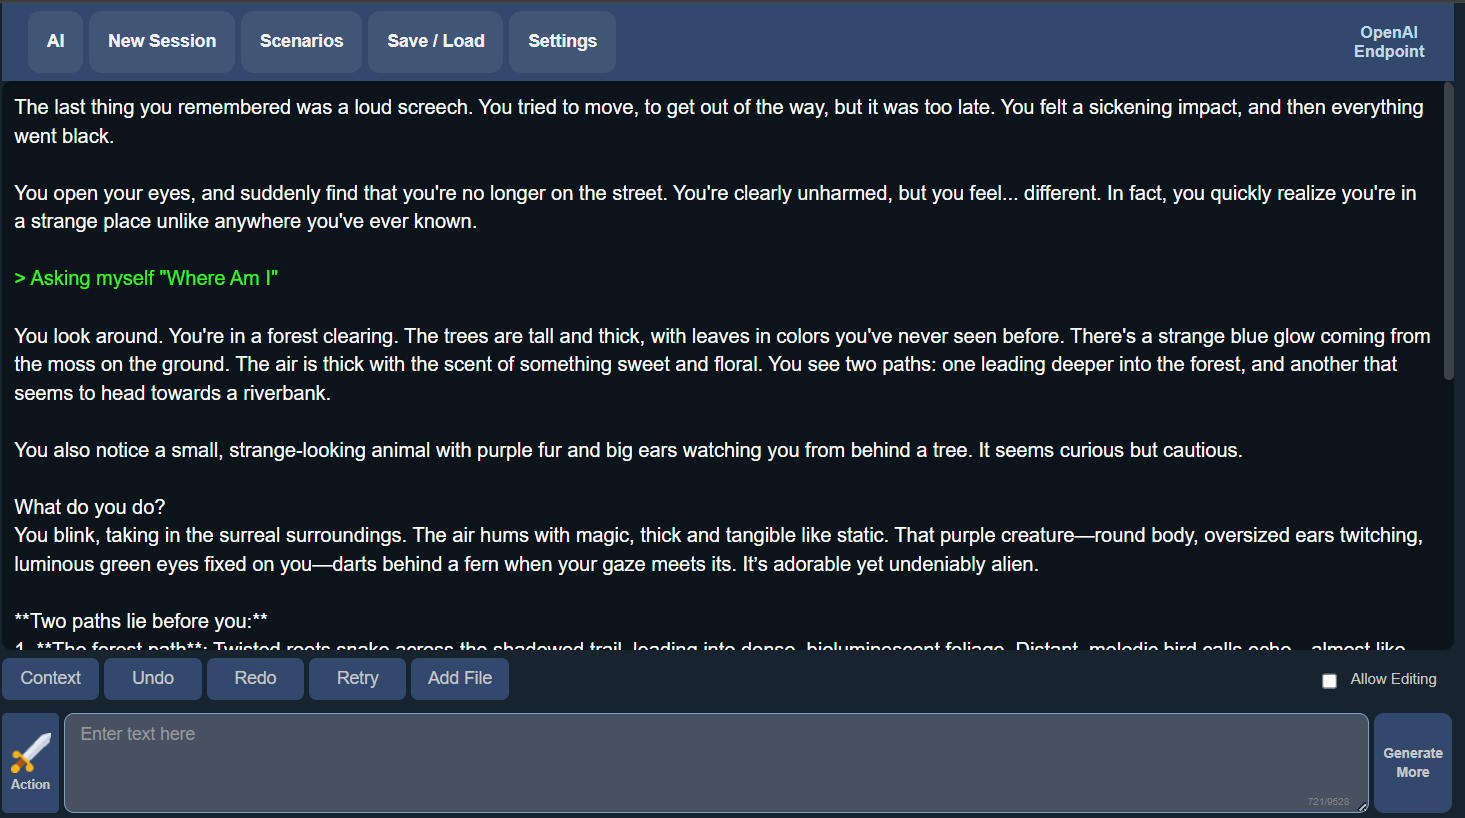
Step 5: Test Your Setup
Start interacting with your AI character! Experiment with different scenarios to test responses and further refine the character’s personality.
Conclusion
Harnessing KoboldAI with Nebula Block gives you the freedom to create custom AI roleplay characters that are personal, dynamic, and engaging. By following this step-by-step guide, you can develop unique characters that evolve alongside your narrative, backed by powerful infrastructure for a seamless experience.
What’s Next?
Sign up and explore now.
🔍 Learn more: Visit our blog and documents for more insights or schedule a demo to optimize your search solutions.
📬 Get in touch: Join our Discord community for help or Contact Us.
Stay Connected
💻 Website: nebulablock.com
📖 Docs: docs.nebulablock.com
🐦 Twitter: @nebulablockdata
🐙 GitHub: Nebula-Block-Data
🎮 Discord: Join our Discord
✍️ Blog: Read our Blog
📚 Medium: Follow on Medium
🔗 LinkedIn: Connect on LinkedIn
▶️ YouTube: Subscribe on YouTube